After placing a digit, check what it changes before starting another search across the whole grid. A new number rules itself out of the empty cells in its row, column and box. One of those cells may now have a single candidate, giving you a reason to keep looking nearby.
This routine is for the player who can explain a move but loses their place while looking for the next one. It does not promise a particular finishing time. The worked position below shows how to follow a short run of deductions without guessing or repeatedly inspecting unchanged notes.
Start with a check you can finish
Look for a row, column or box with few empty cells. List its missing digits, then check the crossing units before entering anything. A row missing 3 and 8 is a useful place to look, but it is not permission to put 3 in the first gap. Both numbers might still fit there.
If that pass finds nothing, scan one digit through the boxes in a consistent order. Existing copies of the digit block rows and columns. The hidden-single walkthrough shows how those exclusions can leave one place. Finish checking the relevant box before moving to the next digit, so an unchecked gap does not become a supposed deduction.
There is no need to force the same opening on every puzzle. The useful habit is knowing what you just checked, and what new information would make it worth checking again.
A placement that tells you where to look next
In this original position, row 3, column 1 can only be 6. Row 3 is missing 6, 7 and 8. Its column already contains 7 and 8, ruling out both alternatives.
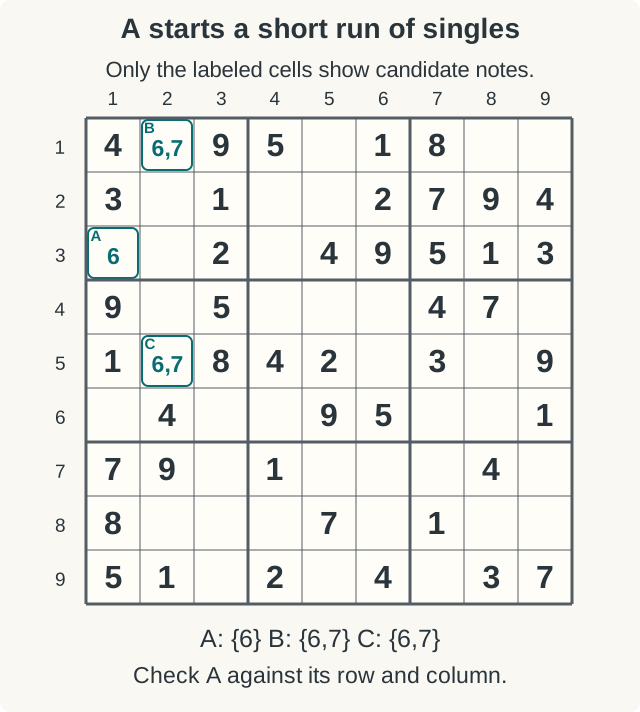
Enter the 6 at A. Before scanning elsewhere, check the other empty cells in the top-left box. B, at row 1, column 2, had only 6 and 7 available. The new 6 shares its box, so B becomes 7.
The other row and column through A are also sensible places to inspect. You do not have to find every consequence before taking B. Each confirmed placement gives you a new starting point.
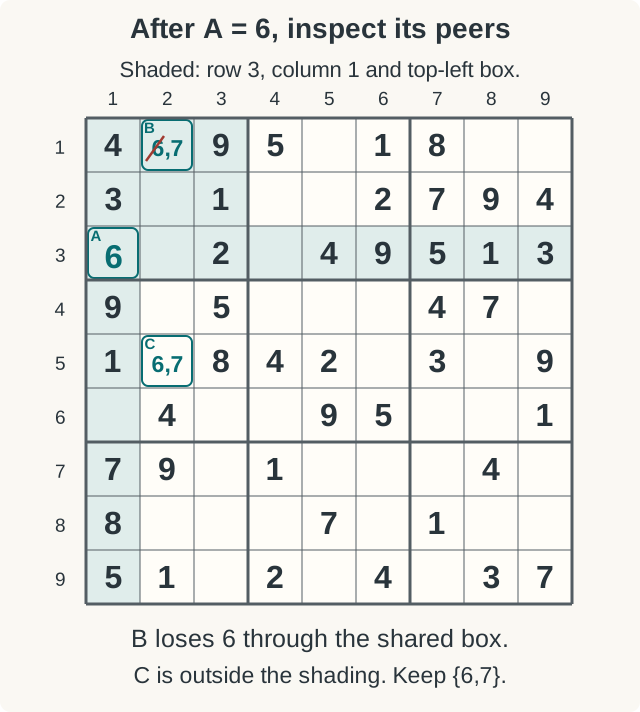
Now enter the 7 at B and follow column 2. C, at row 5, column 2, still has 6 and 7. It loses 7 through that column, leaving 6. C was outside A's immediate reach, but B provides the missing connection.
This is why “stay local” is a search priority rather than a rule forbidding you to look elsewhere. Follow the consequences of each new placement. Candidate changes can also reveal a hidden single in another unit through an affected cell, so the three shaded units are not a boundary around every possible deduction.
Try the next link
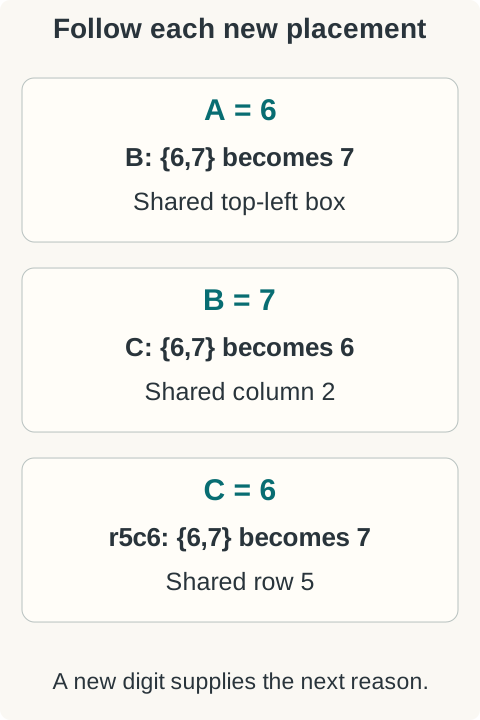
After entering the 6 at C, inspect row 5, column 6. Its candidates in the original position were 6 and 7. What can you enter now? Name the shared unit that supplies the reason.
See the answer and the three links
Enter 7. C supplies a 6 in row 5, so the other cell in that row loses 6. Neither A nor B directly removed a note from this cell. The new placement at C is the reason it changes now.
When the trail stops
Keep your notes current as you place digits. Remove a placed number from its peers, but do not erase it from an unrelated cell simply because you just used it. If you have previously made valid logical eliminations, preserve those removals instead of restoring every digit that passes a basic row-and-column check.
When the recent changes offer no move, return to a wider scan. Check whether a missing digit has only one home in a unit, then use the candidate methods you know. Partial notes can help you remember a possibility, but two handwritten digits do not establish that these are the cell's only candidates. The rules and techniques guide explains the distinction between a placement and an elimination.
For practice, use an Easy Sudoku and pause after each entry long enough to name the row, column or box you will inspect next. If you lose the thread, leave a small mark on paper beside the last confirmed move. After the solve, note where the delay occurred: finding a move, checking its reason, or entering and cleaning notes. Those are different tasks to practice. A faster timer on a different puzzle does not, by itself, show which habit improved.
Watch a scanning walkthrough
Smart Hobbies' Top 6 Scanning Tips To Solve Sudoku Quicker follows a separate competition puzzle. Watch how the presenter selects a digit and checks where it can go. The puzzle and its explanations are the creator's material; the A-to-B-to-C position above is separate.
References
Conceptis' scanning techniques explain checking a cell against its row, column and box. Its solving tips recommend pencilmarks and checking before entering a digit. Sudoku.com's thinking-ahead lesson illustrates using one confirmed placement to find another. No source board or image was reused here.